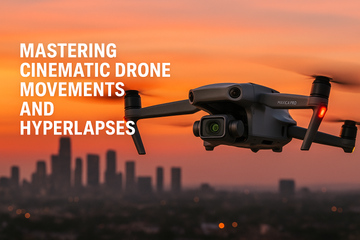
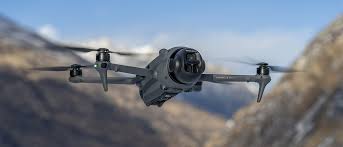
Mastering Cinematic Drone Movements and Hyperlapses with the DJI Mavic 4 Pro
The DJI Mavic 4 Pro isn’t just another drone—it’s a professional filmmaking tool that puts cinematic storytelling at your fingertips. With its advanced 1-inch sensor, 8K video capabilities, and intelligent flight modes, the Mavic 4 Pro allows creators to capture breathtaking footage that feels straight out of a movie.
Among the most powerful techniques for elevating your aerial work are cinematic movements and hyperlapse sequences. When done right, these add depth, emotion, and drama to your content. Let’s explore how to master them.
1. Understanding Cinematic Drone Movements
Cinematic drone footage is all about smooth, controlled motion that enhances the story. The Mavic 4 Pro’s gimbal stabilization and precise controls make it ideal for these moves:
✅ The Reveal Shot
Fly behind an object (like trees or a building) and slowly rise or pan to reveal a stunning landscape or subject. Perfect for opening scenes.
✅ The Orbit (Point of Interest)
Use the FocusTrack mode to orbit a subject while keeping it centered in frame. Creates a dynamic, professional feel.
✅ The Push-In / Pull-Out
Fly forward (push-in) to draw viewers closer to a subject or backward (pull-out) to reveal its surroundings. Great for building emotion.
✅ The Tracking Shot
Lock onto a moving subject with ActiveTrack 6.0 and follow smoothly. Ideal for vehicles, athletes, or wildlife.
✅ The Top-Down (Bird’s-Eye View)
Fly directly overhead for symmetrical, abstract visuals—excellent for cityscapes, roads, or natural patterns.
2. Mastering Hyperlapse with the Mavic 4 Pro
Hyperlapse is essentially a moving timelapse—your drone slowly flies while capturing frames that are later stitched into a video. The Mavic 4 Pro simplifies this with built-in Hyperlapse modes:
📸 Free Mode
Manually control the drone during the hyperlapse for total creative freedom.
📸 Circle Mode
Orbit around a subject while creating a timelapse effect—ideal for landmarks.
📸 Course Lock
Set a direction and speed, and the drone automatically flies a straight path while capturing the hyperlapse. Perfect for city skylines or mountain ranges.
📸 Waypoint Mode
Define multiple waypoints, and the drone flies between them automatically, creating smooth, cinematic hyperlapses.
Pro Tips for Hyperlapse:
-
Shoot at manual exposure to avoid flickering.
-
Use an ND filter to maintain cinematic shutter speeds.
-
Fly slowly and steadily—small movements look best in hyperlapse sequences.
-
Always plan your flight path ahead of time.
3. Adding Cinematic Flair
To truly master cinematic drone filmmaking, combine movements and hyperlapse techniques with:
-
🎬 ND filters for smooth motion blur
-
🎶 Sound design & music in post-production
-
🎨 Color grading to match your creative mood
The Mavic 4 Pro’s 10-bit D-Log recording gives you the flexibility to push your footage in post while maintaining detail.
Final Thoughts
The DJI Mavic 4 Pro is a powerhouse for aerial storytelling. By mastering cinematic movements like reveals, orbits, and tracking shots—and combining them with hyperlapse techniques—you’ll capture footage that feels polished, professional, and unforgettable.
Whether you’re filming travel vlogs, commercials, or personal projects, these techniques will help you transform simple flights into cinematic masterpieces.
#DJIMavic4Pro #CinematicDroneShots #DroneHyperlapse #AerialFilmmaking #DronePhotography #DJI2025 #DroneCinematics #DroneTips #ContentCreationTools #EpicDroneFootage


