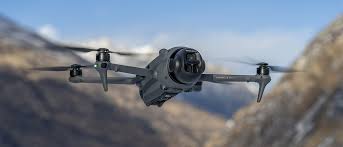
From Auto to Pro: The Ultimate Guide to the DJI Air 3S’s Best Camera Settings
The DJI Air 3S is an incredibly capable drone right out of the box, capable of capturing stunning aerial footage even in its automatic settings. However, to truly unlock its cinematic potential and achieve that professional look, you need to venture beyond the "Auto" mode and take control. This guide, crafted with the stunning landscapes of Ontario in mind – from the vibrant cityscape of Toronto to the serene beauty of Algonquin Park – will walk you through the essential camera settings on your Air 3S, empowering you to capture breathtaking, cinematic aerials.
The Golden Rules of Cinematic Drone Video
Before we dive into the specific menus, let's establish two fundamental principles that underpin cinematic drone videography:
-
The 180-Degree Shutter Rule: This rule dictates that your shutter speed should be approximately double your frame rate (or as close as possible). For example, if you're shooting at 30 frames per second (fps), your shutter speed should ideally be around 1/60th of a second. This creates a natural amount of motion blur, which is crucial for smooth and visually pleasing movement in your videos. Without proper motion blur, footage can look choppy and unnatural.
-
Manual Exposure is Your Friend: While automatic exposure can be convenient, it often reacts abruptly to changing light conditions, resulting in jarring shifts in brightness. By taking control of your aperture (fixed at f/1.7 on the Air 3S's main camera), ISO, and relying on ND filters to control light, you can maintain consistent exposure and a more cinematic feel. The histogram on your DJI RC 2 controller is your best friend here – aim to keep the exposure within the graph without clipping the highlights or shadows.
Core Video Settings Walkthrough (Step-by-Step)
Now, let's navigate the DJI Fly app and dial in those pro settings:
-
Resolution and Frame Rate:
-
4K/30fps: This is often the sweet spot for a classic cinematic look. The 30 frames per second provide a film-like cadence.
-
4K/60fps: Ideal for capturing smoother action or for those who might want to slow down the footage slightly in post-production (to 30fps for a 50% slow-motion effect).
-
4K/120fps: Leverage the Air 3S's ability to shoot high-frame-rate slow-motion for dramatic, impactful shots. Remember to adjust your shutter speed accordingly (around 1/250th of a second for 120fps to adhere to the 180-degree rule).
-
-
Color Profile:
-
Normal: This profile delivers ready-to-share footage with baked-in color. It's convenient but offers limited flexibility for color grading.
-
HLG (Hybrid Log-Gamma): Captures more dynamic range than the Normal profile, providing a good balance between ease of use and post-production flexibility for HDR (High Dynamic Range) workflows.
-
D-Log M: This is the professional's choice. It captures a flat, desaturated image with the maximum amount of dynamic range (10-bit color depth on the Air 3S). This gives you the most control in post-production to shape the look and feel of your footage, whether you're aiming for the rich autumn colors of Muskoka or the stark contrasts of a winter cityscape.
-
-
Codec: Stick with H.265 (HEVC). It offers a better balance between file size and image quality compared to H.264, allowing you to capture more detail without filling up your storage as quickly.
-
White Balance: Don't leave this on auto! Set a manual white balance based on the lighting conditions (e.g., "Sunny," "Cloudy," "Shady"). This ensures consistent color throughout your shots, preventing unwanted color shifts as the light changes.
-
ISO: Aim to keep your ISO at its base level, usually ISO 100, to minimize noise. The Air 3S's larger 1-inch sensor excels in this regard, allowing you to maintain lower ISOs even in slightly dimmer conditions. If you need to increase the ISO, do so incrementally and monitor for noise.
Putting it All Together: The Role of ND Filters (Fly More Combo Advantage!)
The ND (Neutral Density) filters included in the DJI Air 3S Fly More Combo are not just extras; they are essential tools for achieving cinematic motion blur and controlling your exposure in bright conditions.
-
Why Use ND Filters? In bright daylight, to adhere to the 180-degree shutter rule (e.g., 4K/30fps at 1/60th of a second), you'll likely be overexposing your image, even with the aperture at f/1.7 and ISO at 100. ND filters act like sunglasses for your camera lens, reducing the amount of light entering the sensor without affecting color. This allows you to maintain your desired shutter speed for that smooth, cinematic motion blur.
-
Which ND Filter to Use?
-
ND8: Ideal for slightly bright or overcast conditions.
-
ND32: Best for moderately bright sunlight.
-
ND128: For very bright, direct sunlight.
-
Experiment with the filters to find the right balance that allows you to maintain your desired shutter speed while achieving proper exposure.
Bonus: Advanced Shooting with Intelligent Modes
Don't shy away from the Air 3S's intelligent flight modes – they can be powerful tools when used deliberately:
-
ActiveTrack 360°: Practice using this mode to create smooth, dynamic tracking shots. With the Air 3S's enhanced omnidirectional sensing and forward-facing LiDAR, tracking subjects, even in slightly more challenging environments, is more reliable than ever. Focus on smooth gimbal movements and intentional flight paths.
-
MasterShots & QuickShots: While these automated modes are great for quick, shareable content, try to analyze how they move the camera and replicate those techniques manually for more creative control.
Conclusion
Moving beyond the automatic settings on your DJI Air 3S and embracing manual control over your camera will dramatically elevate the quality of your aerial footage. By understanding the fundamentals of shutter speed, exposure, color profiles, and the crucial role of ND filters (especially with the Fly More Combo), you can capture truly cinematic visuals that showcase the beauty of your surroundings, whether you're soaring above the bustling streets of Toronto or capturing the tranquil beauty of Ontario's vast wilderness. So, take the plunge, experiment with these settings, and watch your aerial storytelling take flight!
#DJIAir3S #DJIAir3 #DroneSettings #CinematicDrone #DroneTips #DronePhotography #DroneVideography #DroneFilmmaking #NDfilters #DLogM #DroneGuide #DJICanada #DroneLife


