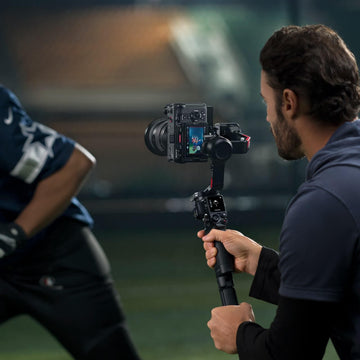
Balancing your gimbal is the single most important step to unlock smooth, cinematic footage. Whether you’re a beginner setting up your first stabilizer or a professional switching between camera rigs, this DJI RS 4 balancing and setup guide will walk you through everything you need to know.
Why Proper Balancing Matters
Before diving into the steps, it’s important to understand why balancing matters:
-
Extended Battery Life – A well-balanced gimbal puts less strain on the motors.
-
Smoother Footage – Proper balance reduces micro-jitters and motor vibration.
-
Quicker Setup – Once you master balancing, switching between cameras becomes effortless.
Step 1: Mount the Camera
-
Attach the quick-release plate to your camera. Make sure the plate is firmly tightened.
-
Slide the camera onto the gimbal’s mounting base until you hear a click. Lock it in place.
👉 Pro Tip: Remove heavy accessories (like lens caps or hoods) until after balancing.
Step 2: Balance the Tilt Axis
The tilt axis ensures the camera doesn’t tip forward or backward.
-
Unlock the tilt motor.
-
Move the camera forward/backward until it stays level when released.
-
Lock the adjustment knob once balanced.
👉 Quick Check: Point the camera upward and downward. It should stay in place without swinging.
Step 3: Balance the Roll Axis
The roll axis prevents your camera from leaning to one side.
-
Unlock the roll motor.
-
Slide the camera left or right until it stays perfectly level.
-
Tighten the knob to lock it in place.
👉 Quick Check: Tilt the gimbal sideways — the camera should not shift.
Step 4: Balance the Pan Axis
The pan axis controls left-to-right rotation.
-
Unlock the pan motor.
-
Hold the gimbal upright and tilt it slightly forward.
-
Slide the camera base backward or forward until the camera doesn’t swing.
-
Lock the knob securely.
👉 Quick Check: When you rotate the gimbal left or right, the camera should stay centered.
Step 5: Run Auto-Tune
-
Power on the DJI RS 4.
-
Open the DJI Ronin app and select Auto Tune.
-
The gimbal will fine-tune motor strength for your setup.
👉 Pro Tip: Re-run Auto Tune if you change lenses or add new accessories.
Extra Balancing Tips
-
Use lighter lenses for faster setup and better results.
-
Mark positions on your quick-release plate with tape or a marker if you switch cameras often.
-
Balance without a battery grip first; add accessories later.
Final Thoughts
The DJI RS 4 makes balancing straightforward once you practice the process. A properly balanced camera not only improves performance but also extends your shooting time. With this step-by-step guide, you’ll be ready to achieve silky-smooth shots every time.


