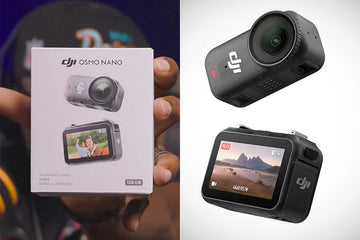
The DJI Osmo Nano is finally here after weeks of leaks and teasers—and if you’ve just unboxed yours, you’ll want to get shooting fast. This 10-minute quickstart guide covers the essential setup steps, from pairing with the DJI Mimo app to dialing in cinematic settings like 10-bit D-Log M, Horizon Balancing, and Super Night mode.
1. Pair with the DJI Mimo App
-
Power on the Osmo Nano and enable Bluetooth/Wi-Fi on your phone.
-
Open the DJI Mimo app (iOS/Android).
-
Tap “Add Device” → select Osmo Nano → follow the on-screen pairing prompt.
-
Once linked, you can preview shots in real time, access editing templates, and sync settings.
👉 Tip: Enable Wi-Fi 6 transfer in settings for up to 80MB/s wireless exports.
2. Toggle 10-bit D-Log M for Flexible Color
-
Navigate to Settings → Color Profile → D-Log M.
-
Use D-Log M for high-contrast scenes or when you want to grade later.
-
Stick with Standard for quick social-ready clips.
👉 Pro move: Download LUTs into your editing software to speed up color grading.
3. Set Stabilization Mode
The Osmo Nano offers two key stabilization options:
-
RockSteady 3.0: Best for action, running, biking—smooths out bumps.
-
Horizon Balancing: Keeps the horizon level within ±30°, great for POV and vlogs.
Switch modes in Stabilization Settings depending on your shot.
4. Try Super Night Mode
Low-light is often tricky at 60fps.
-
Enable Super Night mode under Shooting Options.
-
The Nano automatically applies advanced noise reduction for cleaner indoor or evening shots.
-
For best results, drop to 4K30/24fps in dark environments.
5. Lock White Balance
-
Go to Settings → WB → Manual.
-
Choose daylight (≈5500K), tungsten (≈3200K), or custom.
-
This prevents unwanted color shifts mid-recording.
6. Check Battery & Fast Charging
-
Out of the box, the Nano has ~40–50% charge.
-
Connect via USB-C PD cable for fast charging: 0–80% in just 20 minutes.
-
Fully charged + Vision Dock = up to 200 min recording (1080/24p).
👉 Tip: A PD power bank is a must-have for travel creators.
7. Explore Magnetic Mounts
-
Try the lanyard, hat clip, or ball-joint adapter.
-
Remember to attach the safety tether—especially during action shots.
-
The Nano’s dual-sided magnets mean you can mount it forward or backward instantly.
8. Run a Quick Test Shoot
-
Record in 4K60, Standard color.
-
Switch stabilization modes mid-test.
-
Try one daylight clip and one indoors with Super Night.
-
Review in DJI Mimo to confirm exposure, WB, and framing.
Final Word
That’s it—you’re ready to roll with the DJI Osmo Nano in under 10 minutes. Lock in your color profile, stabilization, and white balance, and you’ll be capturing cinematic footage from day one.
👉 Grab our launch bundle with PD cable + lanyard and start creating without limits.
Keywords
dji osmo nano setup, osmo nano quickstart, dji mimo pairing, osmo nano fast charging, osmo nano horizon mode, osmo nano 10-bit D-Log M, osmo nano super night, dji osmo nano beginner guide, osmo nano accessories
Hashtags
#SpeedyDrone #DJI #OsmoNano #ContentCreators #VloggingSetup #CinematicVideo #Stabilization #NightPhotography #DJIMim